Sunday, February 23, 2014

Chorizo Onion and Cheese Omelet

Good Morning Everyone

Well it's been a while since I've posted on my blog, and I'm going to try and do a better job of being more regular.  I injured my arm earlier this year and just didn't have the motivation to cook while in a cast.  I'm happy to say that all is well and I'm back at it.

For you folks that are trying to lower your carb intake, this is a really yummy omelet.  Making Omelets are somewhat tricky, if they are to come out light, fluffy and full of flavor.  In my opinion, there is nothing worse that an overcooked flat omelet.

The basics are to sauté your ingredients in an omelet pan first, so a little prep is needed.  For this I diced up some onion and Chorizo, and threw it in the pan.  No need for oil, there will be plenty that cooks out of the sausage.  Once some of the fat is rendered out of the sausage and the onions have a little color on them, add in two beaten eggs.  At this point you need to lift up portions of the edge of the Omelet and tip some of the uncooked egg under the omelet.  This is what builds height.  Go around the pan and do this on all sides.  Once most of the egg mixture is cooked, you need to flip the omelet over for not even a minute.  This finishes cooking the egg.  Not flip back, add your cheese, fold over and put on a plate.

ENJOY!


Monday, December 2, 2013

Spare Ribs

There are so many opinions when it come to cooking ribs, so let me say from the very beginning...this is MY opinion, and I fully understand there are a million other ways to produce a yummy rack of ribs.  In the many folks that I have chatted with regarding ribs, there seems to be two schools of thought...the "OMG they are fall of the bone tender" and the "Tender but a little tooth required to get off the bone".  Generally, and I do mean generally, to get ribs to slide off the bone clean, some sort of steam or moisture is required.  I think that if ribs are steamed before they are smoked a lot of the flavor of the pork is lost.  So in my method today, I'll discuss how I generally like to smoke ribs.

First of all...get a smoker.  I've done the charcoal and wood smokers, and they require much tending.  For the past several years I have been using a Brinkman electric smoker.  These maintain the perfect temperature and little attention other than adding smoking wood is required.

Secondly, choose your ribs.  Baby back ribs are always good, but lately I prefer Spare Ribs.  These are larger pork ribs with a bit more fat, but I think have more flavor and provide me the end product I most enjoy.  Again..a personal choice.

Third, get the ribs prepared for a rub.  On the back of your ribs, there is a membrane that can be left on, but I prefer to remove it.  To do this, you simply create a cut with a knife, then using a paper towel, pull off that membrane.  This allows your rub to penetrate the meat and give you a more tender product throughout.

Next, chose or make a rub.  I like to do the following...Equal parts of:

Kosher Salt
Smoked Paprika
Hot Smoked Paprika
Thyme
Sugar
Garlic Powder
Onion Powder
Fresh ground black pepper

Rub this mixture on both sides of the ribs and let sit for an hour.

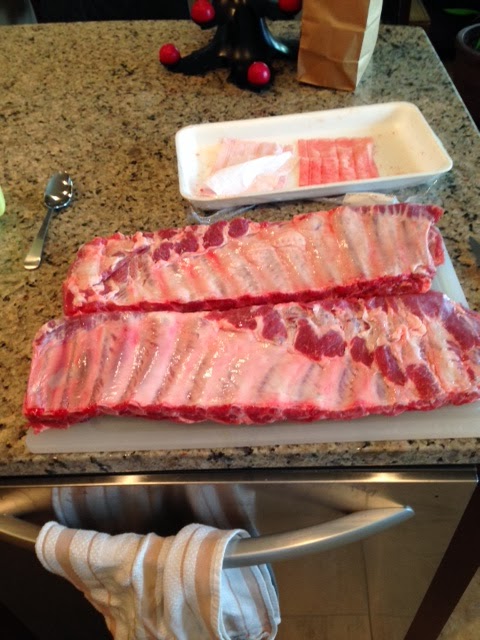
The final step in creating ribs is putting them on the smoker.  On my Electric smoker I cook spare ribs 6-7 hours, depending on how meaty they are.  The batch of ribs you see here came out tender...full of flavor and was a super easy meal to prepare on a lazy Sunday afternoon.

Tuesday, November 26, 2013

Fillet Mignon in a Bourbon Cream Sauce - Look what I found in the Freezer!

My better half has decided that the Schwann's truck that  comes through our hood is a GREAT shopping experience and regularly fills our freezer with a host of products from fish to Fillet Mignon's.  I've been doing my level best to cook what he buys, and last night I found the last two Fillets from some previous shopping trip.  Since it was pretty chilly outside, I decided to use a cast iron pan and make my "ATKINS" friendly meal in the warmth of the kitchen.


Fillet:  Made a rub of salt pepper, paprika (hot) garlic and onion powder and some ground thyme.  Liberally seasoned the meat and set out to come closer to room temp.  Heat up a cast iron pan over med high heat till smoking.  added a little olive oil and butter and seeded one side till nicely browned.  Turn over and finished in the oven for about 12-15 minutes.  This produced a Med / Med Rare Fillet.  Let them rest for 5 minutes while I made the sauce.  Deglazed the pan with chicken stock..though beef would have been a better choice...just didn't have any open.

Added a couple shots of Bourbon and flamed that.  As it reduced and the flames went down, I added some cream, salt and pepper and reduced to the consistency I wanted.  Off heat I whisked in a tablespoon of butter.  Served this over mashed cheesy Cauliflower and steamed broccoli.

Monday, November 25, 2013

Baked Eggs in Ham Cups

Ok, so I've been on this Atkins diet, and have been looking around the net for some good low carb recipes.  I came across one that I had to try and believe me when I say its not only easy, but looks pretty cool when you are done.  Instead of re-writing my version, I'm going to link and give props to the web site where I found the recipe.

NOTES:  Due to the saltiness of the ham and any cheese you put in it, I recommend not salting the egg until after you have it on your plate.  Pepper yes, but salt....I'd watch it.  I'm anxious to maybe try this with turkey or pastrami as a different twist.

Here's what mine looked like after they were out of the oven:


and no, I didn't eat the toast
Website for Baked Eggs

Directions:
Preheat oven to 375 degrees and line small, lightly greased ramekins with two thinly sliced (but not too thin) pieces of your favorite ham, making sure there are no large holes or gaps. One of my favorite ham cups is the Greek ham cup. Sauté some spinach in hot oil with a minced clove of garlic until soft. Put a spoonful into your ham cup. Add a few small cubes of feta and a bit of diced cherry tomato. Gently crack an egg on top and pop into the oven for 22-25 minutes until the egg is set how you wish. The ham edges will look crispy, but just snip them with scissors. Gently lift out of the ramekins and onto a plate. Serve with sliced avocado, salt and pepper for the perfect brunch or breakfast.
Other fillings I love:
Southwestern cup with sautéed diced red bell peppers, mushrooms, onions and tomatoes, with cracked egg on top.

Tomato, mozzarella and pesto cup. Put mozzarella pearls into ham cup, add a tiny scoop of pesto and a small scoop of diced tomato. Crack egg on top, and bake.

Friday, November 22, 2013

Are you tired of DRY pork?

You know, I remember growing up and hearing my mom tell me that pork needed to be cooked throughly so you won't get trichinosis.  Well, I think there were a couple of generations that prepared pork to the point it would chew like a hockey puck it was cooked so long.  Today, pork is raised differently and there hasn't been many cases of this illness for a quite a while.  If you go to the CDC's website, they will tell you to cook pork to 145 degrees and you're good!

Pork is a very lean meat, so I recommend brining as discussed in an earlier post.  This will really help keep your pork moist when cooking it, but if you take that meat to 250 degrees...not even brining can help!

USE A MEAT THERMOMETER!  I prefer the instant digital read versions for grilling and a probed version when cooking meat in the oven.  You can set your thermometer to alert you when your food gets to the right temp, and take it out before it's ruined.  I recommend these devices highly when cooking pork as the leanness of the product has little forgiveness if it's overdone.

I grilled these tenderloins the other evening after brining them for about three hours.  I took them to 145 degrees then brought them in and let them rest for 5-10 min.  Yes, you may see a bit of pink, but it's fine...I promise...and the juiciness of the product was perfect.


Thursday, November 21, 2013

Thin Tender Asparagus

When you are able to find thin tender asparagus at the market...I highly recommend buying it.  As you can see in the picture, a little red onion sautéed with these tender bites make a fantastic side dish.  Kosher Salt and fresh ground black pepper is all you need to really enjoy the freshness of this veggy.

Now I know some of you like to add a little kick at the end, so here are some suggestions.

1.  just at the end, add a little balsamic vinegar to the dish, toss and serve.  Don't drown it..you still want to taste the veggies!

2.  Lemon or Lime (I prefer Lime) juice.  Great enhancer to the dish and still allows the flavors of the asparagus to be tasted.

Wednesday, November 20, 2013

Green Tomatillo Braised Pork Butt

Well for those of you who were following this little blog, I'm please to share that I'm back in the Kitchen with a clearance from my Doctor on the ol' arm.  One of my favorite cuts of meat to cook slowly is Pork Butt.  Usually I get them bone in, but today when I went to the Grocery, all they had were boneless.  I think for this recipe, either will work fine.  Not only is this good the night you make it, but there are lots of fun things you can do with the left overs as well.  This is Atkins friendly (yes I'm doing that)


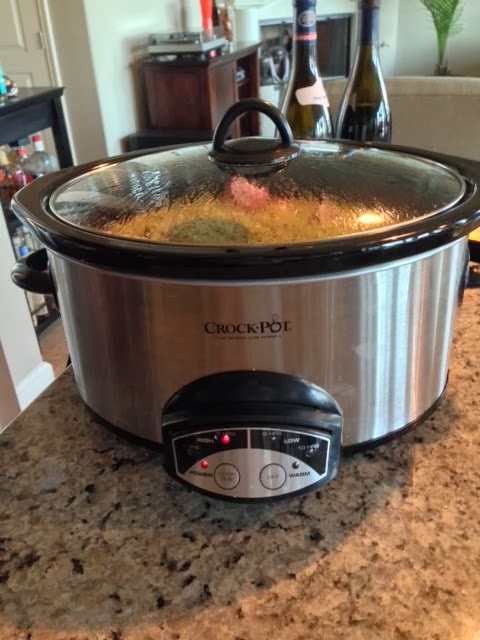
Now, I use a crock pot for this, most of the time, only because I think they do a great job at cooking low and slow.  You can certainly do this in the oven at 325 or so...either way will work great.


1 Pork Butt (Boneless or Bone In)
10 Tomatillo's (skin off and quartered
2 serrano peppers
2 garlic cloves
Tsp Salt
Tsp Pepper
Tsp cumin
1/2 cup water
2 red onion's quartered
Small Red Potatoes ( as many as you like)


First, liberally salt and pepper the entire pork butt and brown all sides in a big pan.  Make sure you get a nice brown sear on it...brown mean flavor!  Once done, put in your crock pot and put on high.  This will take about 6 hours to get super tender.  Next quarter those onions and place them around the pork.  I deglaze the pan I seared the meat with some water at this point and pour that over the roast...MORE FLAVOR!

Now take your tomatillos, serrano's garlic salt pepper cumin and water, put in a blender and blend well.  Pour this mixture over the pork, cover and let go for about six hours.  Once 2-3 hours in, add your potatoes and let it finish cooking.

SERVING - I like to take some of the green chili sauce, defat it and put it in a sauce pan.  Heat this up and reduce it a bit, then add some cream to make a green chili cream sauce.  This is amazing over the pork once it's done.

Enjoy!