If you have leftover chili and a box of cornbread mix this is a good way to use leftovers. In a baking dish pour out some of your cornbread mix in the bottom. Top that with leftover chili and some shredded cheese, then top that with more batter. Bake until golden brown and the batter is set. Slice and top with sour cream and some salsa! Trust me this will become a fav!
Sunday, January 24, 2021

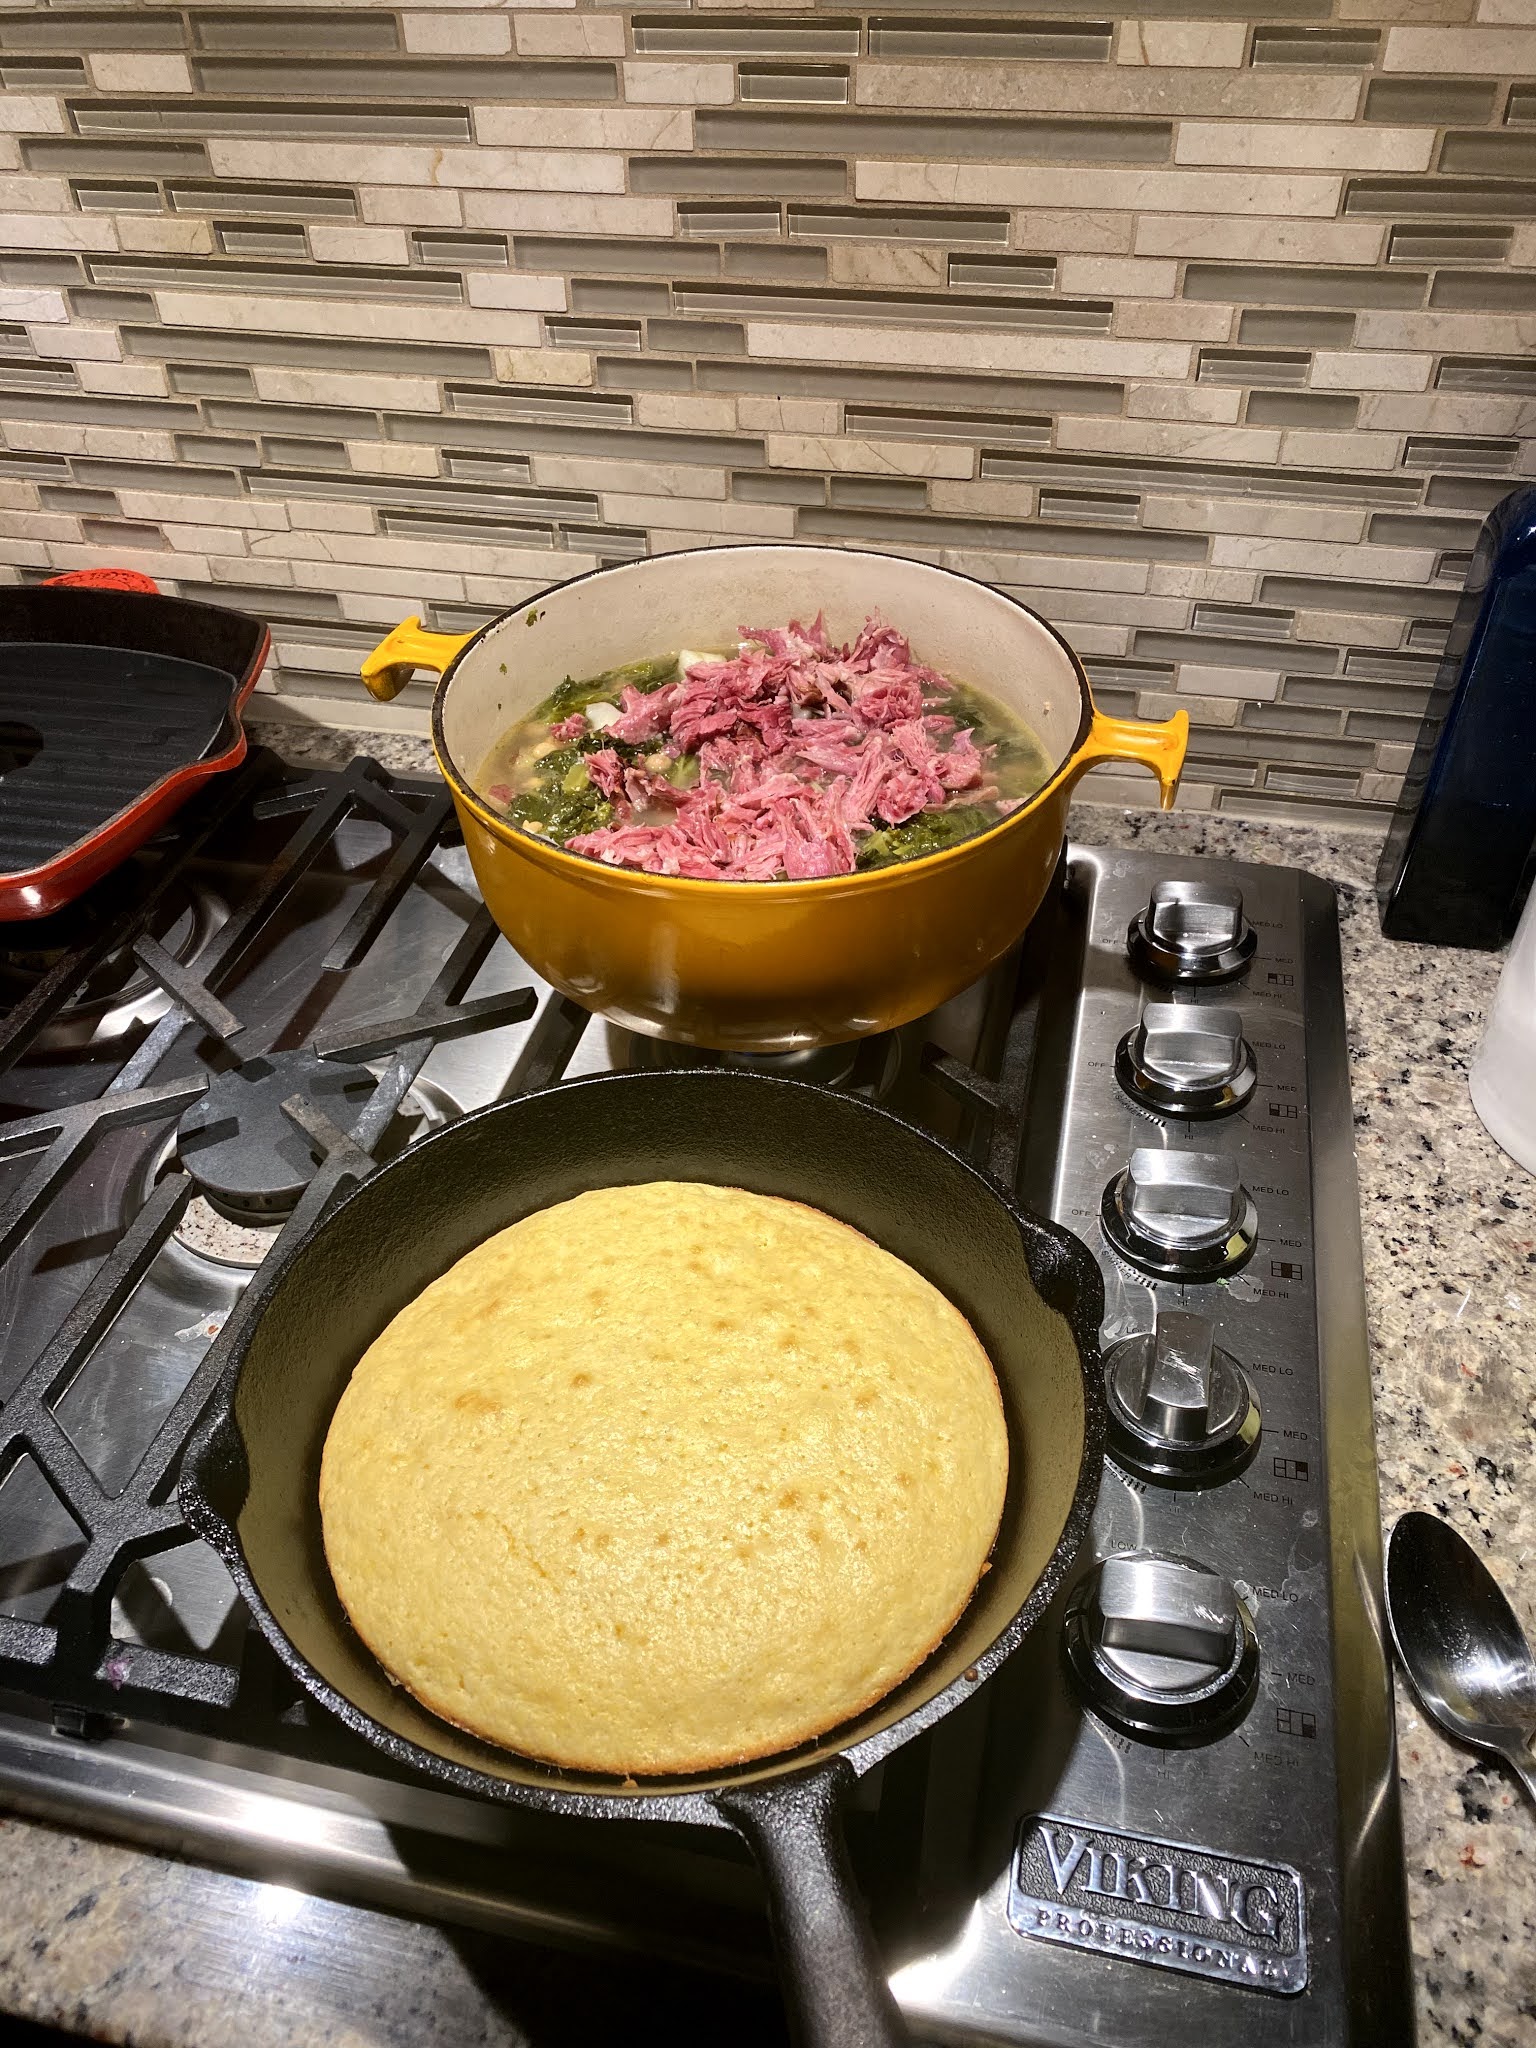
Farmers Market Greens with Chickpeas potatoes and ham
After a trip to my local farmers market, I decided to play around with making some greens with a few additions. In this recipe I used Kale and Radish greens for a little variety.
First things first, make your broth. I added onions and a ham hock to some water and chicken base and let that simmer for around three hours. The meat on the ham hock has to be tender so it can be shredded later.


Enjoy!
Sunday, September 30, 2018
Potatoes, Ham and Eggs in a cast iron skillet.
 These little cast iron skillets are awesome vessels for an easy breakfast dish. In this dish I used some left over oven roasted potatoes and peppers along with some fresh sliced mushrooms I picked up at the farmers market yesterday. I diced up some ham and added that as well. Preheat your oven to 500 degrees, and put a pizza stone on the wire rack. Those it's not as good as a wood fired oven, it's the best way to approximate that style of cooking. As it heats up, wipe the skillet with some olive oil and put in your potatoes, mushrooms and ham. When the oven reaches 500, pop in your skillets for about 5 to 10 minutes, until the contents are hot and sizzling. Next step, take out the skillets one at a time and crack two eggs over the top, salt and pepper and return them to the oven. Cook them until you get the doneness on your eggs you desire. Remove and serve with a couple slices of toast.
Wednesday, February 28, 2018
Bulk Spices are the way to go!

That's your tip for the day!
Kevin
Friday, January 5, 2018
Sous Vide Chicken Thighs
In December I ate a double cut pork chop at a hotel restaurant that is in a small town near my house. I like pork, and a pork chop is one of my favorite cuts for sure. When this dish came to the table, I was shocked how flavorful and tender it was...only to find out their method of cooking was to Sous Vide it, then finish it on the grill.
For Christmas this year I can say that I am now the proud owner of a Joule Sous Vide machine. So far, I've tried Pork and Chicken...both came out amazingly well. This method of cooking maintains the proper temperature, and allows you to impart flavor better than any other cooking method I've seen to date. Here are a few pic's of Chicken Thigh's we did this week. If you haven't tried this method of cooking.....do a bit of research and pick up a Sous Vide unit that will work for you and is in your budget. I'm super happy with my Joule!
Joule Web Page


For Christmas this year I can say that I am now the proud owner of a Joule Sous Vide machine. So far, I've tried Pork and Chicken...both came out amazingly well. This method of cooking maintains the proper temperature, and allows you to impart flavor better than any other cooking method I've seen to date. Here are a few pic's of Chicken Thigh's we did this week. If you haven't tried this method of cooking.....do a bit of research and pick up a Sous Vide unit that will work for you and is in your budget. I'm super happy with my Joule!
Joule Web Page


Tuesday, January 2, 2018
Roast Beef Hash


 As you can see in the picture, there is leftover potatoes, carrots and roast beef. To that, I add an onion and some parsley. This mixture is run through a grinder on a rough grind...you don''t want it super fine by any means!
  Once you grind the mixture, the next step is to fry it up in your favorite skillet...I use cast iron. I do this on a medium heat and let it sit for a bit to develop a crust, then turn it / mix it up again and then let it sit to brown. Do this until you reach the doneness you desire. As you can see in my pic below, I like my hash done pretty well because I serve a fried egg over the end result, or as you can see in this pic.....grilled sausages. Season to your liking and enjoy that in some cases...the leftovers are better than the original meal!
 Wednesday, December 13, 2017
Gordon Ramsay's Scrambled Eggs
Wow, it's been forever since I've posted on here, and I'm hoping to change that beginning with this post. So I've watched this video numerous times over the past couple years, but never tried to cook this as Gordon did. The past two mornings I've made scrambled eggs this way, and I can vouch it's my new favorite way to scramble eggs. These come out to creamy and perfect...I can't imagine going back to my old methods. Check out this video, and give it a try..you won't be disappointed. The only drawback to this method is the cleanup in a regular pan...I may get a non-stick sauce pan just for this recipe....maybe LOL.
Gordon Ransay's Scrambled Eggs
Gordon Ransay's Scrambled Eggs
Friday, December 9, 2016
Braised Short Ribs
 One of my favorite things to make when it's chilly outside are braised short ribs. This little one pot meal is always a crowd pleaser, and sure to fill your house with all kinds of good smells. I use a Le Cruset dutch oven as my browning and baking dish.
 1. I use the grocery bag I brought home the grocery store as my flour bad. Put some flour along with a good amount of salt and pepper into the bad. Place the short ribs into the bag and shake. This gives a nice even coating, then you can simply throw away the bag!
2. Brown the floured short ribs on all sides, set aside on a plate.
 3. To the oil in the pan, add a diced onion, 5-10 cloves of garlic chopped, a carton of brown mushrooms, salt, pepper and a few pinches of dried thyme. Sauté a few minutes, then add a cup of red wine and a cup of beef broth.
 4. Add the browned short ribs, meat side down, along with some small potatoes. If the liquid doesn't almost cover the meat, then add equal parts of wine and broth to make that happen.
5. Pop the dish into the oven, covered and let it cook for 3 to 3.5 hours on 325.
When it comes out of the oven, it will look like this. Gently take out the ribs and place them on a plate. Plated, it looks like the final pic. I did some Broccolli as a side, simply steamed then buttered with salt a pepper.

 f
f
Sunday, October 18, 2015
Cioppino
One of my favorite dished to make is Cioppino, or Italian seafood soup. This is such a simple dish to serve, but rather complex to make if it's done right. They key to a great cioppino is making a great stock that the seafood is cooked in. I always try to keep any shrimp shells or especially lobster shells that I use throughout the year. Sometimes you can get shells at your local market...but I've found that is getting more difficult these days. For the stock I use:

Shrimp Shells....quite a few!
Onion
Two Garlic Cloves
Three Carrots cut up
Three celery stalks cut up
Teaspoon of whole peppercorns
Three bay leaves
Two pinches of fennel seeds
Saute all this in a stock pot for a few minutes, then add water to cover by 4 inches. Cook this for 30-40 minutes...no more..it will get bitter. Once cooked, strain through a fine mesh strainer.
Now that the stock is done, it's time to make the actual broth you will cook the seafood in. To the stock add:
1 large can of crushed tomatoes
1/2 teaspoon of basil, marjoram, and thyme
Salt and Pepper to taste...it will take quite a bit of salt!
Simmer this for at least an hour to cook out the raw tomato taste and to let all the spices meld together. If you like your broth a bit more spicy...add more pepper flakes...but be careful, you don't want to overpower the seafood.
 Once the stock is done...it should look like the pic to the right. Now that it's at a simmer or low boil, it's time to add the seafood. The fun part it you get to choose whatever you like. Usually my choices include a firm fish cut into cubes, shrimp, small clams and scallops. Be creative and add whatever you like. If you add it all at once...usually everything is done when the shell food opens.
Serve with toasted bread for dipping. I forgot to take a pic of my soup, but I've included some stock photos of what it looks like.
Enjoy!


Shrimp Shells....quite a few!
Onion
Two Garlic Cloves
Three Carrots cut up
Three celery stalks cut up
Teaspoon of whole peppercorns
Three bay leaves
Two pinches of fennel seeds
Saute all this in a stock pot for a few minutes, then add water to cover by 4 inches. Cook this for 30-40 minutes...no more..it will get bitter. Once cooked, strain through a fine mesh strainer.
Now that the stock is done, it's time to make the actual broth you will cook the seafood in. To the stock add:
1 large can of crushed tomatoes
1/2 teaspoon of basil, marjoram, and thyme
Salt and Pepper to taste...it will take quite a bit of salt!
Simmer this for at least an hour to cook out the raw tomato taste and to let all the spices meld together. If you like your broth a bit more spicy...add more pepper flakes...but be careful, you don't want to overpower the seafood.

Serve with toasted bread for dipping. I forgot to take a pic of my soup, but I've included some stock photos of what it looks like.
Enjoy!

Saturday, March 7, 2015
Broccoli and Bacon Salad

I love to find things that completely surprise me, and this little dish is a winner in my books. Here in Texas we have grocery stores name HEB. In my local HEB they have a cooking center where store cooks / chef's take store ingredients and create something yummy. This is usually bundled with a sale on various products...it is a store for goodness sake. I always like to try what they have, and in most cases it's usually tasty, but not something I'd make at home. In this case...I bought every ingredient and duplicated this at home. Our local chef that created this at HEB is named Suzie. I love chatting with her and applaud her for creating this dish. Simply follow the instructions on the card below and enjoy! A pic of what I created is below.
NOTE: This makes a LOT of salad. I halved it and it would serve 4 easily.


TATER TOT Casserole
 Good Morning and Happy Saturday
So this is one of my favorite morning meals, I suppose because it has Tater Tots in it. This is always a crowd pleaser, and best of all it heats up so well the next day if you have some left over!
The first step in this dish is to decide what you want as your filler. In this dish that is posted, I used cut up Asparagus, diced ham, bacon and onion. The best part is YOU can choose anything you wish.
HOW TO MAKE:
1. Whisk up 5 eggs with a bit of milk. To this mixture add Salt and Pepper to taste, and if you wish add some seasonings like Thyme, Basil, etc.
 2. Saute your filling mixture of whatever you like. (non-stick pan!) If you want to use what I did...simply sauté the above. When you have cooked this for about 5 minutes, add a couple handfuls of Tater Tots. Distribute everything evenly in the pan, then mix in your egg mixture. Immediately mix in a bit of shredded cheese, stir a bit, then sprinkle more cheese on the top
3. Once the cheese is on, Bake in the sauté pan at 350 until the mixture is set. This usually takes about 20 minutes.
4. Remove from the oven and let sit for about 5 minutes. Using a spatula, slide onto a plate as you see above. Slice and serve!
Additions: Here are some things I like to top it with when serving.
a. Sour Cream
b. Salsa
c. Chives
Enjoy this.....it's YUMMY!
Eat Well
Kevin
Monday, January 12, 2015
Pork Loin Roast with Garlic and Cranberry Compote
Happy New Year
 So to get started in 2015, I thought I'd put up a recipe I did a few weeks ago that turned out pretty well. What I cooked was the end piece of a complete Pork Loin I purchased and cut into chops. The ends taper down and make a fantastic roast if you don't over cook them. For this recipe I marinated the roast in an Italian dressing and froze it after being sealed with my food saver. This was a super method for getting the marinade in the meat and provided nice additional flavor. After thawing, I heavily salted and peppered the entire roast. I then seared off the meat, getting good color on it, and finished it in the oven with many garlic cloves that had been tossed in olive oil. I used an external thermomiter and brought the internal temperature to 150 degrees.
 I served this with a cranberry compote I made using fresh cranberries, sugar, some lime juice and a touch of cinnamon. A quick sauce of asparagus, red onion and red bell peppers were also invited to the party. I'm pleased with the way this came out and would most definitely make it agin.

I served this with a cranberry compote I made using fresh cranberries, sugar, some lime juice and a touch of cinnamon. A quick sauce of asparagus, red onion and red bell peppers were also invited to the party. I'm pleased with the way this came out and would most definitely make it agin.Friday, July 25, 2014
Tofu Bake

INGREDIENTS:
1 BLOCK OF EXTRA FIRM TOFU CUBED
2 CUPS OF BROCCOLI FLORETS
1-1.5 CUPS OF MUSHROOMS QUARTERED
1-1.5 CUPS OF QUARTERED SMALL RED POTATOES
 |
| Ingredients |
3 TABLESPOONS OF PEANUT BUTTER
3 TABLESPOONS OF TAHINI
1 TABLESPOON OF KOREAN CHILI PASTE
1 TABLESPOON OF CHILI PASTE / SRIRACHA
1 TABLESPOON OF SESAME OIL
3 TABLESPOONS OF SOY SAUCE OR BRAGGS
WATER TO THIN AS DESIRED
First step is to chop all your ingredients. What I listed as my veggies is what I like, but feel free to change it up and add or subtract what you like. When using potatoes as I do, it's important to cook it longer so the potatoes get done!
 |
| Mix in a large bowl |
In a large bowl add the peanut butter, tahini, Korean chili paste, sriracha, sesame oil soys sauce and some water. You want a consistency that is somewhat like the thickness of a good paint. Once this is mixed, toss in all your prepared veggies and toss to coat everything in the sauce.
Pour entire mixture into a baking dish and cover with foil. Bake at a 350 degree oven for 40 minutes. Remove foil and cook for a while longer until you see a bit of color on the top of the bake.
Serve this over brown rice with a nice glass of white wine....it's YUMMY.

Wednesday, May 21, 2014
Camping Grub

Caprese Salad:
Such a great salad to have in the summer!
Slice Tomatoes
Slice Mozzarella around the same thickness as tomatoes
Chiffonade a few leaves of basil
Dressing:
4 Tablespoons of Balsamic
1/2 tsp sugar
 1/2 tsp ground mustard
Pinch of salt
While whisking, drizzle in olive oil. Add enough oil to slightly thicken.
Drizzle dressing over the salad, sprinkle the basil and serve!
The Pork Tenderloin is a tried and true recipe of mine. This version we grilled the tenderloins to 155 degrees and served it with a caper cream sauce....it was a crowd pleaser!

Tuesday, May 13, 2014
Asian Style Ribs

I found a frozen rack of ribs in my freezer, left over from some giant meat fest I did earlier this year. I've been wanting to play around with ribs done in the oven, and decided on something Asian inspired. After looking through several recipes, I got the general idea of what I wanted to do.
1. Line a baking sheet with foil (really reduces clean-up later.)
2. On another piece of heavy duty foil, place your ribs, either whole rack or cut in half as you see in the pic. Liberally salt and pepper them, then seal them up in foil. Before you close it up, add about 1/4 cup of water so there is moisture in the foil pack. Seal, place the pouch on the covered baking sheet and put in a 300 degree oven for two hours.
3. Glaze: I basically used equal parts of: Honey, Hoisin, soy and rice wine vinegar. To that I added 1 teaspoon of powdered ginger and 1/2 teaspoon on chili flakes. More if you like it hotter.
4. Open up the foil pack of ribs, exposing them completely. Leave the pouch on the lined baking sheet and brush with the initial coating of your glaze. Put the ribs back in the oven UNCOVERED for another hour, re-basting every 15 minutes.
These ribs were so tender, and the glaze was just perfect. I hope you enjoy them as much as I did!
Eat Well!
Kevin
Monday, April 21, 2014
Easter Turkey - Injected and Smoked
I suppose you could call Sunday's turkey a bit of an experiment, only because I've not injected a turkey before, nor have I smoked an entire bird. I will say, the results were quite tasty, and i'd do it again in a heartbeat. An acquaintance of mine suggested trying Tony Chachere's injectable marinades, he thought they were pretty tasty and produced a moist flavorful bird. So let's give credit where credit is due...here is the link for Tony Chachere's marinades:
Here's what I did:
1. Rinse and pat dry a turkey. I don't recommend going over 12-13 lbs for smoking, it will simply take too long.
2. Using the injector, inject marinade in several spots in the breast meat, legs and thighs. You will notice how the meat of the bird puffs up with the injection liquid.
3. I used a BBQ rub over the entire bird, then let it sit for about an hour. during that time, I got the smoker up to temp...around 225-250 degrees. I used Apple Wood for this recipe. I think it's a milder smoke and usually is my go to wood for poultry.

4. My bird smoked for around 7 hours to get the deepest part of the breast meat up between 165-170. I took it off and let it rest for about an hour while we made the other goodies to go along with the bird.

NOTES: I think the bird came out very well. The meat was amazingly tender and juicy with tons of flavor. I think next time I will make my own marinade and try different flavor profiles. The injection syringe is something that you can use over and over again, but for goodness sake, put it in a safe spot...the point is super sharp! I recommend this method, it's fun and produced a great end product!
Eat Well!
Here's what I did:
1. Rinse and pat dry a turkey. I don't recommend going over 12-13 lbs for smoking, it will simply take too long.
2. Using the injector, inject marinade in several spots in the breast meat, legs and thighs. You will notice how the meat of the bird puffs up with the injection liquid.
3. I used a BBQ rub over the entire bird, then let it sit for about an hour. during that time, I got the smoker up to temp...around 225-250 degrees. I used Apple Wood for this recipe. I think it's a milder smoke and usually is my go to wood for poultry.
4. My bird smoked for around 7 hours to get the deepest part of the breast meat up between 165-170. I took it off and let it rest for about an hour while we made the other goodies to go along with the bird.
NOTES: I think the bird came out very well. The meat was amazingly tender and juicy with tons of flavor. I think next time I will make my own marinade and try different flavor profiles. The injection syringe is something that you can use over and over again, but for goodness sake, put it in a safe spot...the point is super sharp! I recommend this method, it's fun and produced a great end product!
Eat Well!
Monday, April 7, 2014
Stuffed Pork Loin Chop
Inspired by my trip to the Farmers Market this week, I decided to make dinner for my folks Sunday evening. Along with the greens that I posted in the previous entry, I also served Kohlrabi sautéed in garlic and olive oil and a tomato and mozzarrela salad with garlic oil, balsamic and saffron salt. Stuffed chops are super easy, and can be assembled ahead of time to keep kitchen mess at a minimum. This recipe requires brining the pork which is listed in a previous entry.
http://kevsculinarycreations.blogspot.com/2013/07/to-brine-or-not-to-brine.html
Stuffed Pork Loin Chop:
1. Brine the pork as listed above.
2. Make a mixture of diced ham and shredded cheese. Use whatever cheese you like...no rules here.


3. Make a pouch in the chop. This is done by using a paring knife to carefully cut a cavity in the chop. Then pack as much of the mixture in the cavity you just created. See Pic


4. Seal or close the pouch with a toothpick...just remember to remove the toothpick before you serve it!


http://kevsculinarycreations.blogspot.com/2013/07/to-brine-or-not-to-brine.html
Stuffed Pork Loin Chop:
1. Brine the pork as listed above.
2. Make a mixture of diced ham and shredded cheese. Use whatever cheese you like...no rules here.
3. Make a pouch in the chop. This is done by using a paring knife to carefully cut a cavity in the chop. Then pack as much of the mixture in the cavity you just created. See Pic
4. Seal or close the pouch with a toothpick...just remember to remove the toothpick before you serve it!
At this point you can cover the chops, put them in the fridge and keep them ready for when you want to prepare them.
Preparation:
Salt and Pepper your chops. In a pan, heat up a mixture of butter and olive oil and sear one side of the chops to a nice color. Flip the chops and finish in a 400 degree oven for about 8-10 minutes. You don't want to overcook these. When done, let them rest and plate. I served mine with a dark balsamic vinegar drizzled over it...it was fantastic. The darkness of the balsamic almost makes the chop looked burnt...but trust...it wasn't!
Be creative with your stuffings...I've used all kinds of cheese, spicy sausages, and even traditional surfing mixtures.
Enjoy, and Eat Well!
Sunday, April 6, 2014
Kale, a Great Side Dish

How I like to prepare Kale is pretty simple.
1 Bunch of Kale
3 slices of bacon diced
About 1/4 of an onion diced
Pinch of Red Pepper Flakes
2-3 cups of water
Tablespoon of Chicken Base, or instead of water and chicken base, simply use chicken broth.
Salt to taste (be mindful of the chicken base...it's pretty salty!)
Vinegar of your choice to finish
Prepare your Kale. Now, some people actually pull off just the leaves, and don't cook the stems. I on the other hand like the texture and keep most of the stem on the plant. In the pic above you will notice where the leaves start...cut the stems off below that...those are a bit rough. Next wash and cut up the kale. Keep in mind, your kale will shrink a LOT when cooked, so small cuts are not necessary. I usually kind of chiffonade it like i do basil but in 1/2 inch strips.
In a sauce pan, sauté your bacon till almost crisp, then add in your diced onion and cook that for a few minutes. When the onions are starting to cook add in your greens, red pepper flakes, water or broth and cook for a while. Now, it's your choice how long to cook greens, I don't like them complete mush, so I check on them now and then till I find the texture I like. Usually my favorite texture takes about 45 minutes No rules at this point...it will just depend on your preference. When I'm ready to serve, I slash some red wine vinegar into it to add a bit of brightness, taste for salt and serve it up.
Eat Well!

Sunday, March 16, 2014
Separating Eggs Yolks
Ok, this little video is pretty amazing and I can't wait to try. Hope you enjoy this as much as I did.
http://wisemindhealthybody.com/separate-egg-yolk-easy/
http://wisemindhealthybody.com/separate-egg-yolk-easy/
Tuesday, March 11, 2014
How Do you Buy Spices
Hello Everyone! I suppose today's blog entry is more of a tip than anything else, and I promise full of savings! For most of my life when I needed spices, I'd go to the spice isle, look up and down until I found what I wanted, then usually chose the least expensive brand because I found some of those jars of goodness really expensive!
What most people don't realize, spices have a shelf life of 6 months to a year, beyond that they have lost quite a bit of their flavor and "power" so to speak. When I learned this and actually did an inventory of my spices, I found some that I had in my cupboard that were there since college...well beyond the 1 year mark! So, I'd like to recommend you change up the way you deal with spices, from storage to acquisition.
1. Purchase a set of generic spice jars. These come in all sorts of sizes and shapes, and most all include labels for a variety of spices. If they don't come with labels, pull out that old label maker you have laying around and don't know what to do with..OR..use a dry erase marker to write on the top of each jar. Here is an example: This is on Amazon.com, just search for spice jars.

2. AVOID the canned spice isle. Go to a supermarket that has spices in bulk. You will quickly find you can fill a spice jar for less than a dollar vs. several dollars on the pre-packaged type. You can also buy the amount you think you will use in a year vs. a jar that may last until the end of time!
3. Now that you have jars that are all the same size and shape you can arrange them in a variety of ways that fit your cupboard. I purchased a wire tray and line mine up in there...it's awesome and so easy to access.
Once you get used to getting spices in the bulk spice area, you will never go back to the spice isle. I'm not saying that on occasion I don't use pre-packaged rubs and odd spices, but 90% of the time I can get what I need in the bulk area.
Eat Well!
What most people don't realize, spices have a shelf life of 6 months to a year, beyond that they have lost quite a bit of their flavor and "power" so to speak. When I learned this and actually did an inventory of my spices, I found some that I had in my cupboard that were there since college...well beyond the 1 year mark! So, I'd like to recommend you change up the way you deal with spices, from storage to acquisition.
1. Purchase a set of generic spice jars. These come in all sorts of sizes and shapes, and most all include labels for a variety of spices. If they don't come with labels, pull out that old label maker you have laying around and don't know what to do with..OR..use a dry erase marker to write on the top of each jar. Here is an example: This is on Amazon.com, just search for spice jars.
2. AVOID the canned spice isle. Go to a supermarket that has spices in bulk. You will quickly find you can fill a spice jar for less than a dollar vs. several dollars on the pre-packaged type. You can also buy the amount you think you will use in a year vs. a jar that may last until the end of time!
3. Now that you have jars that are all the same size and shape you can arrange them in a variety of ways that fit your cupboard. I purchased a wire tray and line mine up in there...it's awesome and so easy to access.
Once you get used to getting spices in the bulk spice area, you will never go back to the spice isle. I'm not saying that on occasion I don't use pre-packaged rubs and odd spices, but 90% of the time I can get what I need in the bulk area.
Eat Well!
Subscribe to:
Posts (Atom)